
Step-by-step guide on publishing your app on the Apple iOS Store
Prior to doing the following steps, please setup your Firebase & Onesignal account & integrate it into your Gappsy backend. This ensures that push notifications will work. Without the integration of firebase & onesginal, push notifications will not work. The accounts are free to setup and use. Push notifications will not cost money. It is required by apple and android to setup firebase and onesignal in order to use push notifications. Here is the guide, start there prior to following the following steps for publishing: https://gappsy.freshdesk.com/a/solutions/articles/67000720154
First you need to download the apple source code of your app. Go to your app, click on the publication tab and then download the source code (without ads) because apple did a big update recently and has a lot of issues with admob currently. They will reject your app if you do not use the Source code without ads.
Then you need to compile your app manually. We are going to show you, step-by-step how you need to do this.
Here is what you need to know before publishing in the iOS store:
Xcode and MacOS
The certificates
How to create the necessary screenshots
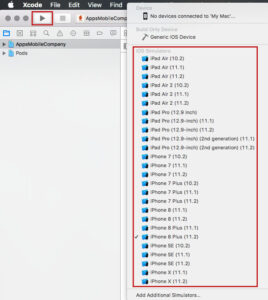
You will need some screenshots to fill out the app sheet on iTunes. You will be able to make them with Xcode and especially with the iOS Simulator delivered with Xcode. Open the Xcode project that is in the ios_source folder (see in the video when opening the project with Xcode), then choose the target, iPhone 8 Plus for instance, and click on the Play button (For your info, the ios_sources of an app can be downloaded from its page from your backoffice > Manage > Applications):
Steps to compile an iOS app
Create the items related to the developer account with which you are going to publish
You have to create a CSR file and an iOS Distribution certificate. And you will be able to use these items for all of the next apps you will have to publish under this developer account –> keep them preciously once created.
The CSR File
It must be created from the keychain access tool of your Mac. Open it from Applications > Utilities > Keychain Access:
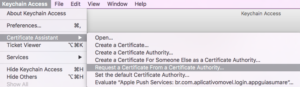
From the menu select “Keychain access” > “Certificate Assistant” > “Request a Certificate From a Certificate Authority”:
In the window that opens, enter the email of the developer account (or any other email address, it doesn’t have any impact), and enter the name of your developer account, and select “Saved to disk”:
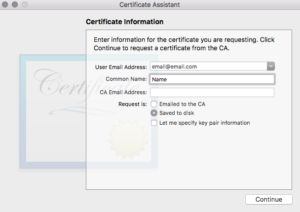
Save this CSR to your disk, in a folder related to the certificates of your developer account.
Close the window.
The iOS Distribution Certificate
– Connect at https://developer.apple.com/membercenter/index.action with the developer account
– Click on “Certificates, Identifiers & Profiles”
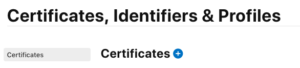
– Click on “Certificates” in the menu on the left, then click on ![]() :
:
– Choose “iOS Distribution (App Store and Ad Hoc)” and click on “Continue”:

– Sign your iOS Distribution certificate with the CSR file you have created before.
– Download the iOS Distribution certificate that has been created.
– Double click on the iOS Distribution certificate (ios_distribution.cer) to add it to the Keychain Access.
Create the items related to the app you are going to publish
The Apple Push Services Certificate
Thanks to this certificate you will be able to add push notifications, in-app purchase, and other services to your app. In our case, only the push notification service is interesting.
– Click on “Identifiers” in the menu on the left, then click on ![]() :
:

– Choose “App IDs” and click on “Continue”:

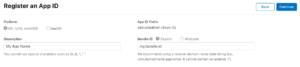
– Enter your app name, the Bundle ID of the app:
![]()
– Go below and select “Push Notifications” in the list of “Capabilities“:

– Click on “Continue“.
– Then click on “Register“.
– In the list, find the App ID you have just created and click on it.
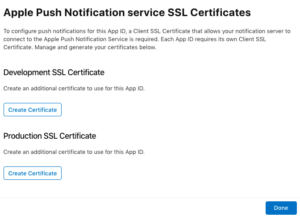
– Go at the bottom and for Push Notifications, click on “Configure”:

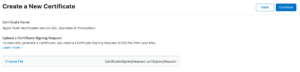
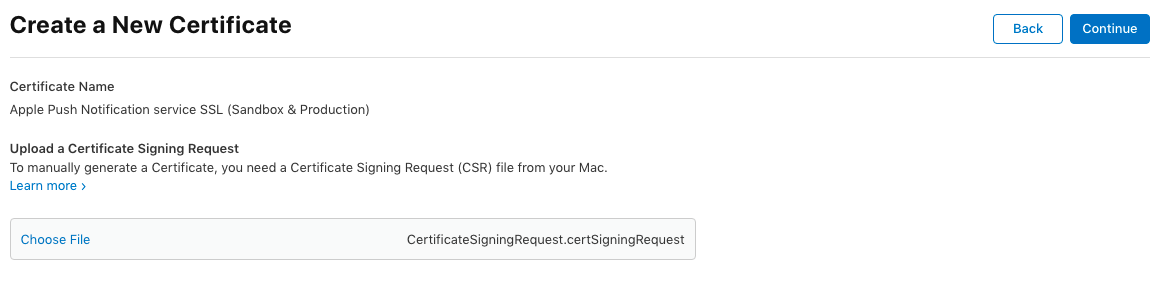
– In “Production SSL Certificate” section click on “Create Certificate”:
– Click on “Choose File” and upload the CSR file you have created before for this developer account (the same CSR you have used to create the iOS Distribution certificate for this developer account):
– Download the Apple Push Services certificate (aps.cer) that has just been created. Store this certificate in a folder related to this app on your Mac.

– Click on “< All Certificates“.
-Double click on the Apple Push Services certificate (aps.cer) to add it to the Keychain Access.
The Provisioning File
– Click on “Profiles” in the menu on the left, then click on ![]() :
:
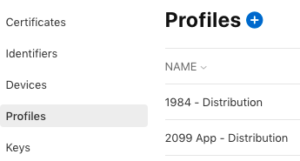
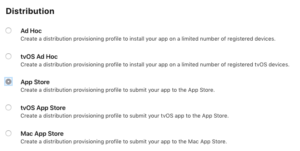
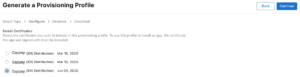
– Choose “App Store” under “Distribution“:
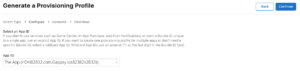
– Select the App ID of your app, and click on “Continue”:
– Select the iOS Distribution certificate associated to the CSR you have used to sign the Apple Push Services Certificate you have created just before (it is very important to use the iOS Distribution which has been created with the CSR used to sign the aps.cer of this app. Don’t forget it, and don’t forget that in case you create a new aps.cer for this app with another CSR you will have to create a new provisionning profile too with the iOS Distribution certificate made with this CSR, and then to publish an update of your app on the App Store)
– Click on “Continue“.
– Name the Provisionning Profile and click on “Continue”
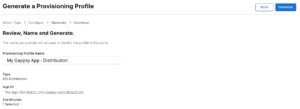
Download the Provisionning Profile that has just been created. Store this certificate in the folder related to this app on your Mac, and which contains the Apple Push Services certificate created just before.
Compiling the app steps :
– Download your iOS source code
– Unzip the folder and open the .xcworkspace file by double-clicking it
Follow these steps inside Xcode:
1. Click on Appsmobilecompany on the left side of your screen.
2. Click on capabilities, then uncheck the audio background mode if your app is not directly related to the music area, do not uncheck remote notifications!
3. Click on the general tab and uncheck “automatically manage signing”
4. In Signing > Provisioning file, select the provisioning file you have just created for your app in the Apple Developer Section
5. On top of the Xcode you can see: Appsmobilecompany and “iphone” besides it. Click on Iphone and then you see all the types of iphones. Choose “generic iOS device”
6. From the Xcode menu , click on Product > Archive.
7. You will see Xcode load.. Let Xcode build all of the tasks.
8. When that’s done, you will see a popup with your app, and buttons saying distribute app and validate app. DO NOT DO ANYTHING YET!!! Go to the “Publishing your app steps” that are mentioned on this page blow and finish these steps first. Once you reach step 13 there, you can come back here and finish the process by following the last steps here.
9. So you finished all of the “Publishing your app steps”. Now you need to follow these last steps to finish your app submission! Now you can click on Distribute app, the button that we talked about in the previous step. Select “iOS app store” and click on next.
10. Select “Upload”
11. Click “Next”
12. Select your iOS Distribution certificate and your provisioning profile of your app.. Then click next.
13. Before clicking on upload, be sure to have completed the “Publishing your app steps” below… If you have done that, click on upload…
14. When the uploading has been done and you see, successfully uploaded you can go back to your apple developer account on https://appstoreconnect.apple.
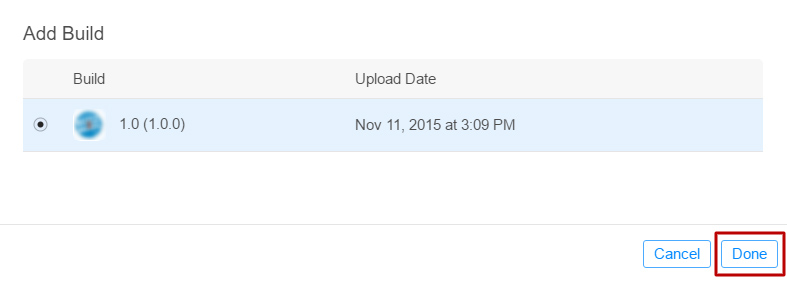
15. You need to wait about 30 minutes, Apple is going to send your build to your apple developer account (you will receive emails from apple regarding this). When the build has arrived you can proceed by adding your build to your app submission

16. Select your build and click Done.
17. In General App Information
– Upload your app’s icon (This icon will appear on the App Store, it must be in JPG or PNG format, 1024×1024, at least 72 DPI, RGB colors, not contain layers or rounded corners, and can’t contain alpha channels or transparencies).
– Edit the Rating of your app and select how often each content description appears in your app.
– Enter the Copyright: The person or entity that owns the exclusive rights to your app, preceded by the year the rights were obtained (for example, “Gappsy 2019”).
– (Optional) The Trade Representative Contact Information. You can provide additional information that will be displayed with your app on the Korean App Store. This information will only appear on the Korean App Store.
– (Optional) Routing App Coverage File. Specify the geographic regions supported by your app. The file must be in the .geojson format.

16. In App Review Information, enter your contact info where Apple can contact you with issues regarding the review process.
This information is not visible to your app users.
If your app integrates a “My Account” tab, you have to provide a user Demo Account to be able to connect to your app.
18. In Version Release, select Automatically release this version.
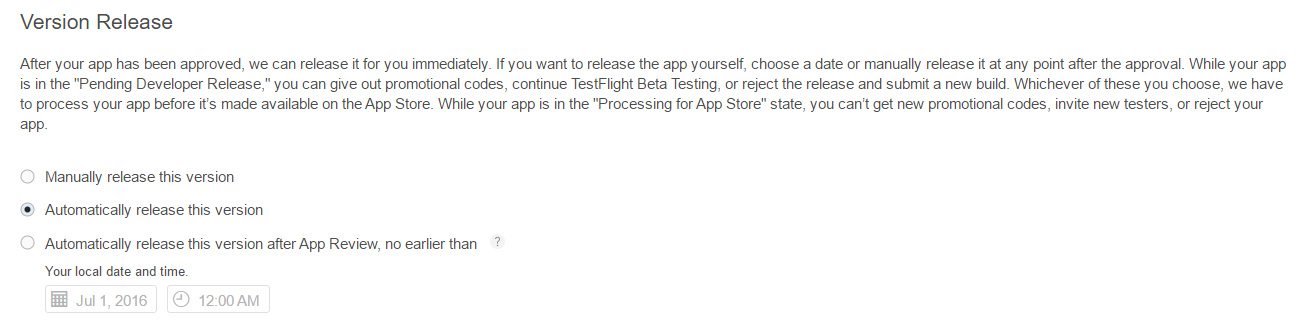
19. Click Submit for Review.

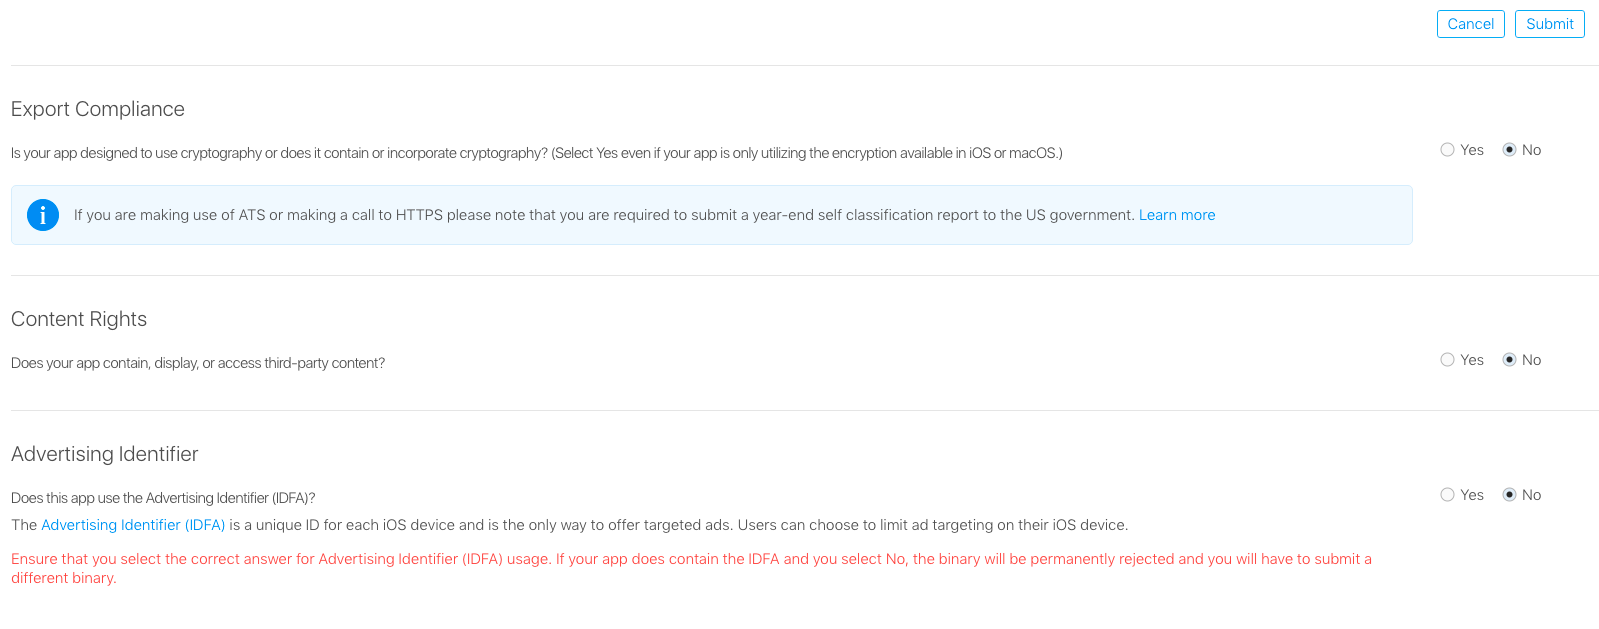
20. In Export Compliance and Content Rights, select No.
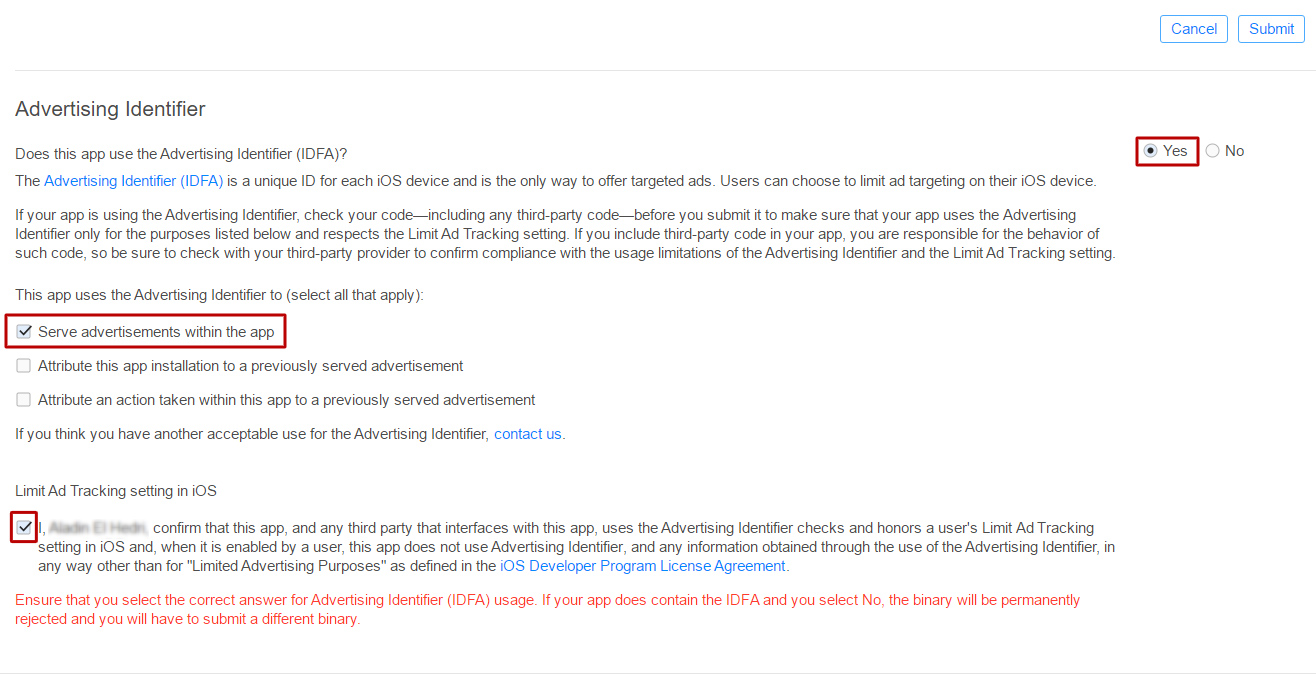
In Advertising Identifier, select No if you have not added AdMob ads and click Submit.
Otherwise, if you have added AdMob ads, select Yes, select the following and click Submit.
21. You are done now. Please go to the end of this page and create the .pem certificate and check out the rest of the info on Push notifications with Gappsy. Complete these last steps to finish it all. Also make sure to keep an eye out on your emails from Apple. They will inform you if there are any issues with your app that you need to change and they will help you get your app approved. You probably need to show some proof of identity and ownership of your app and business. Goodluck, your app will now be live:)
VERY IMPORTANT!
Once your app is live, and you sent the pem. certificate to the Gappsy support team through the website live chat, please tell the Gappsy team that you app is live in the app stores. Once your app is accepted in both the ios and android store, you need to tell the Gappsy team so that they can finally activate your push notifications from the backend! You need to also send the pem. certificate as we mentioned, check the end of this page for more info on the pem. certificate
———————————————————————————————————
Publishing your app steps:
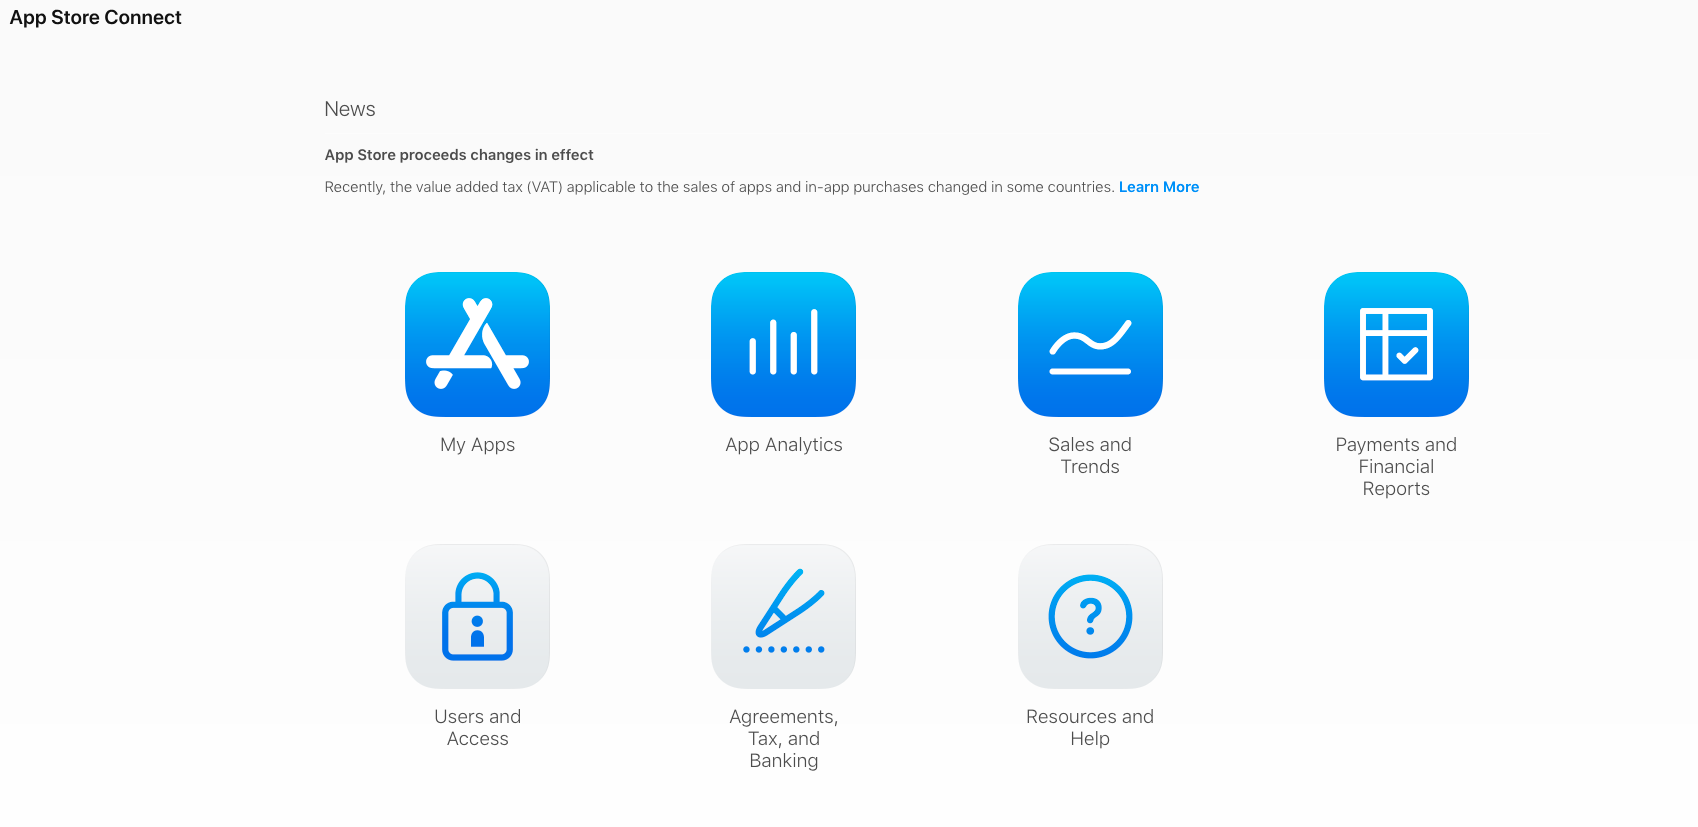
Note: because of Apple Guideline 4.2.6, if you publish an app for a client, you must publish the app with the Apple developer account of your client.Once your app build is created, sign in to your App Store Connect account on https://appstoreconnect.apple.
1. Click My Apps.
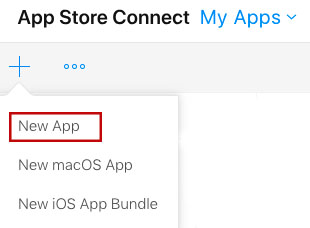
2. Click + and select New App.
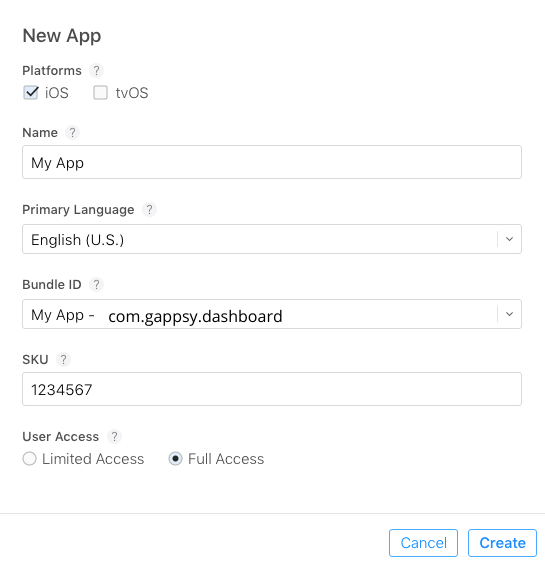
3. Complete the following:
Note: The bundle ID is the unique identifier you have used to create your app build.
The SKU Number is a unique ID for your app, it will not be seen by the users.
4. In App Information, select the category of your app, you can also select a secondary category (optional).
In Privacy Policy URL you have to enter the Privacy policy URL of your app.
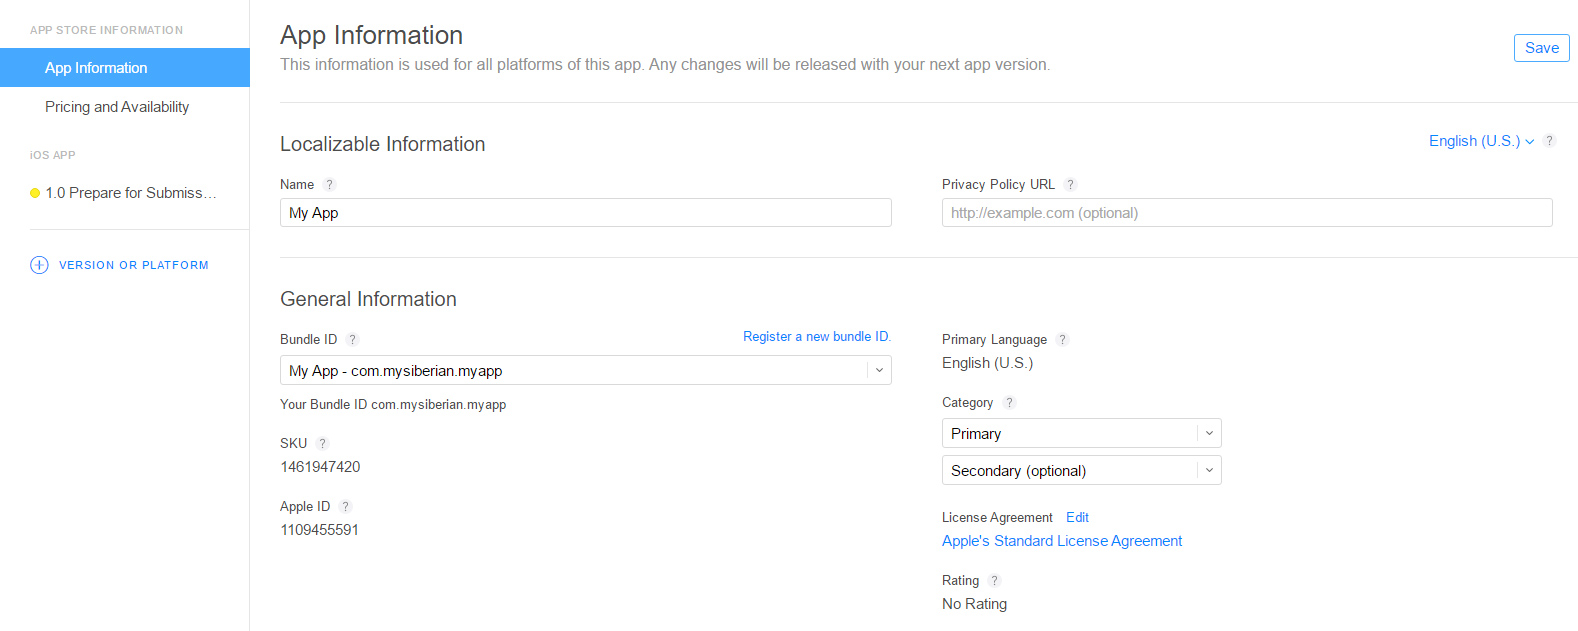
5. Click Save.
6. Click the Pricing and Availability tab.
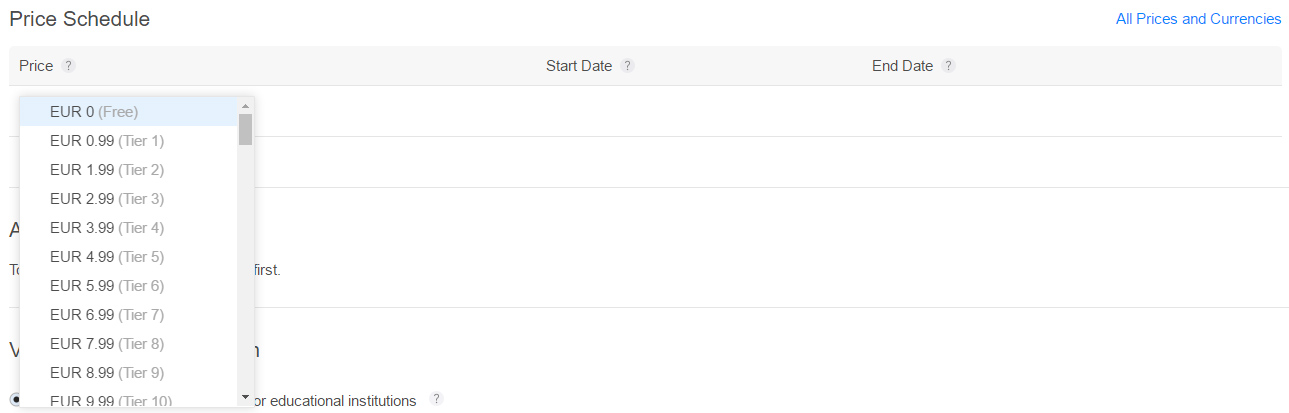
7. In Price Schedule, select the Price of your app.
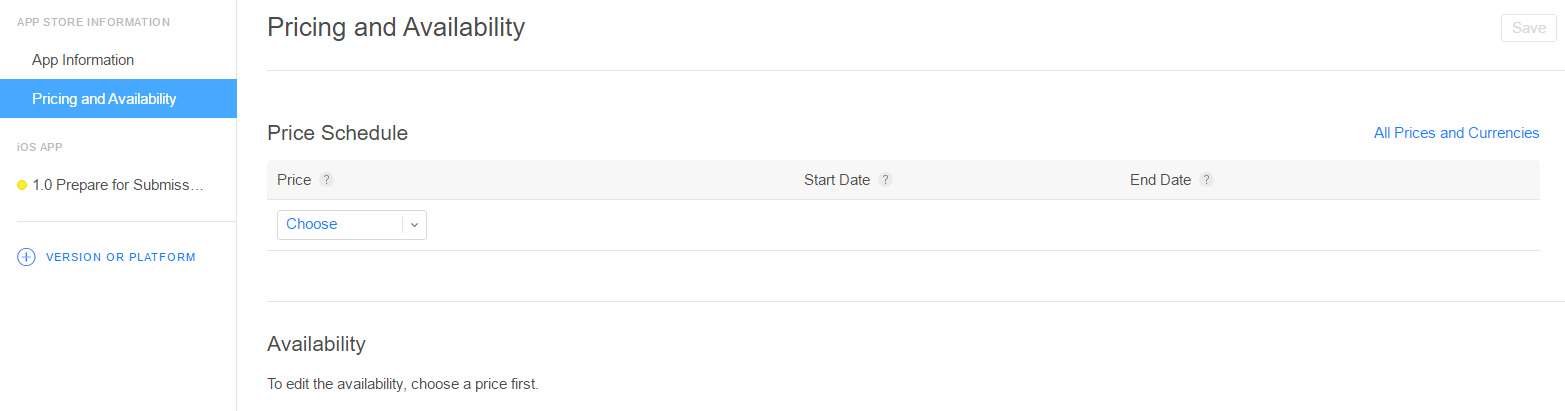
This determines the App Store price and your proceeds. If your app is free, choose Free.
If you want to sell your app, you must have a Paid Application Agreement.
8. In Availability, by default all territories are selected, but you can select the countries where your app will be available.
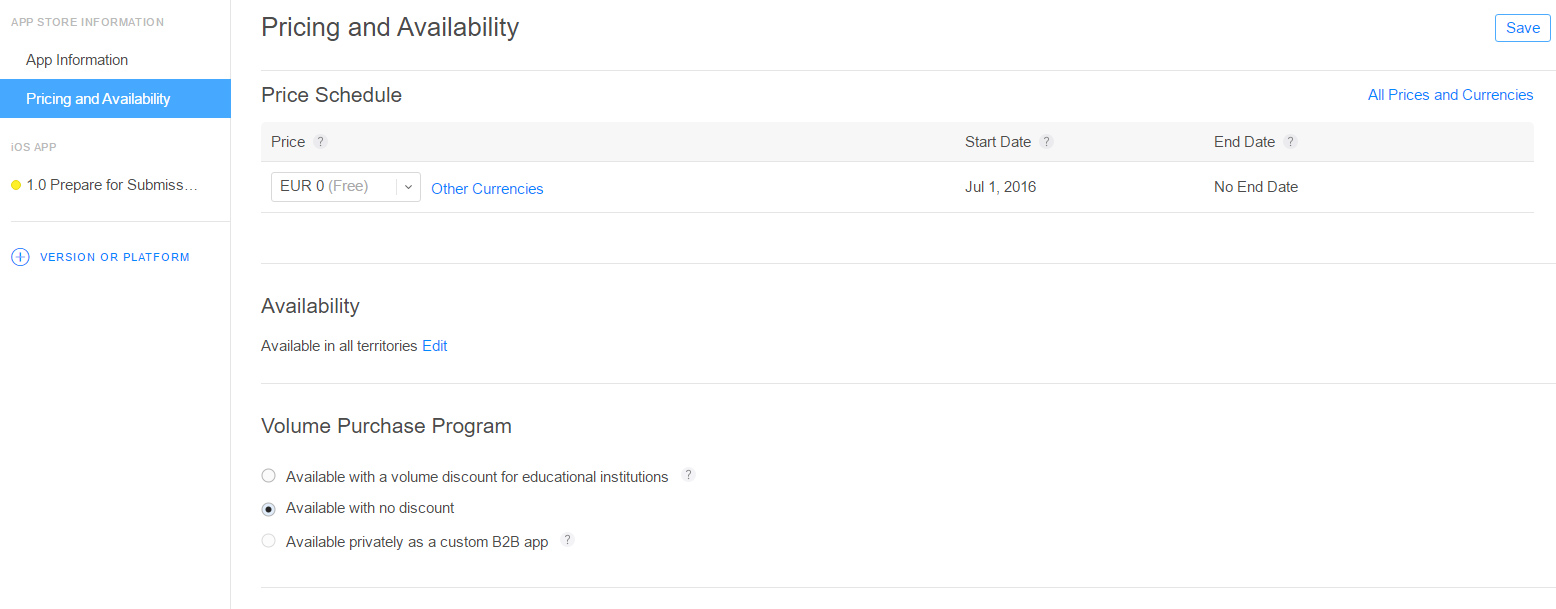
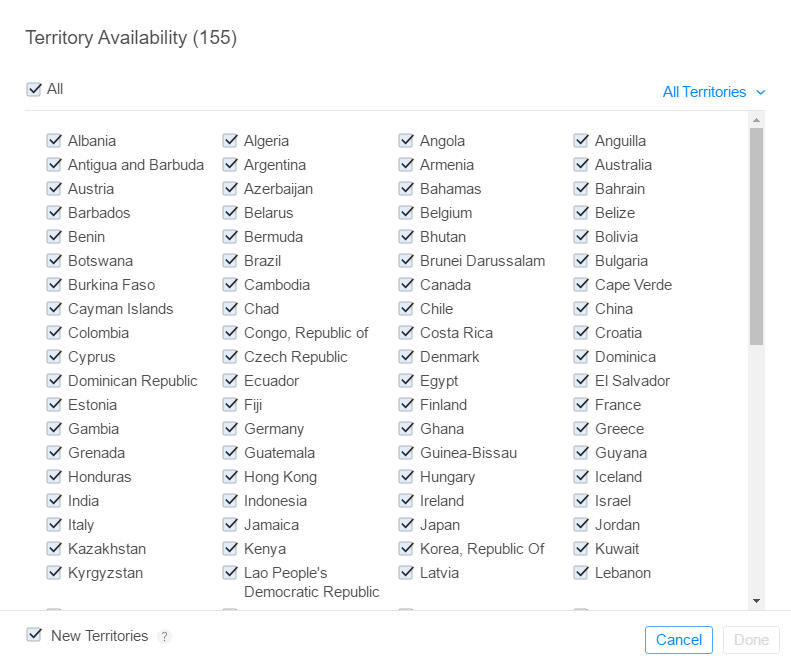
9. Click Save.
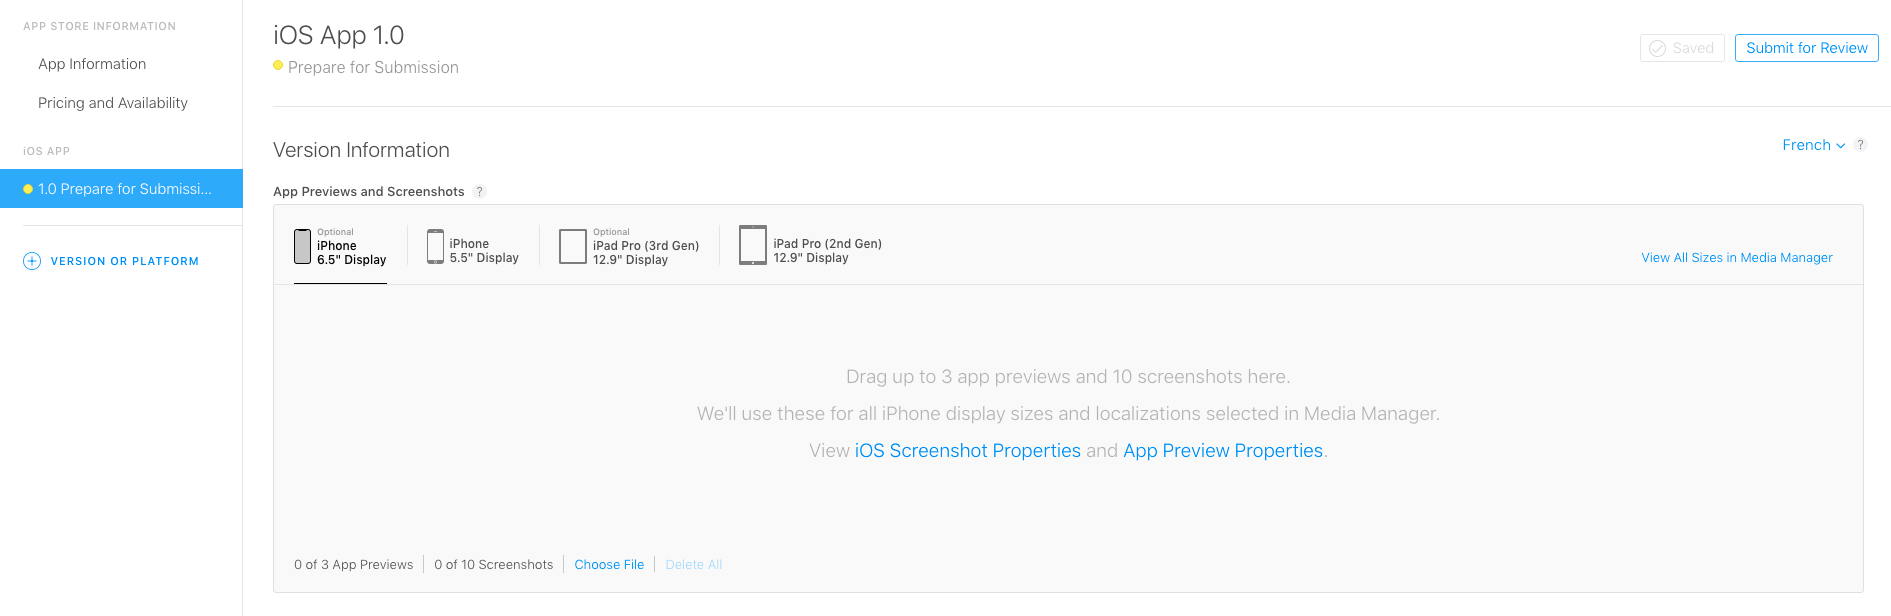
10. Click the Prepare for Submit tab.
11. In Version Information, first add the screenshots of your app.
Choose the device type and drag your images for each format. We explained how to make the screenshots on this page aswell. Scroll up on this page to:
“How to create the necessary screenshots” and make these screenshots!
iPhone: 5.5-inch display (iPhone 8 Plus): 1242 x 2208
You can use 5.5-inch display for all iPhone display sizes.
iPad: 12.9-inch display (iPad Pro 2nd Gen): 2048×2732
You can use 12.9-inch display for all iPad display sizes.
12. Enter the following information for your app:
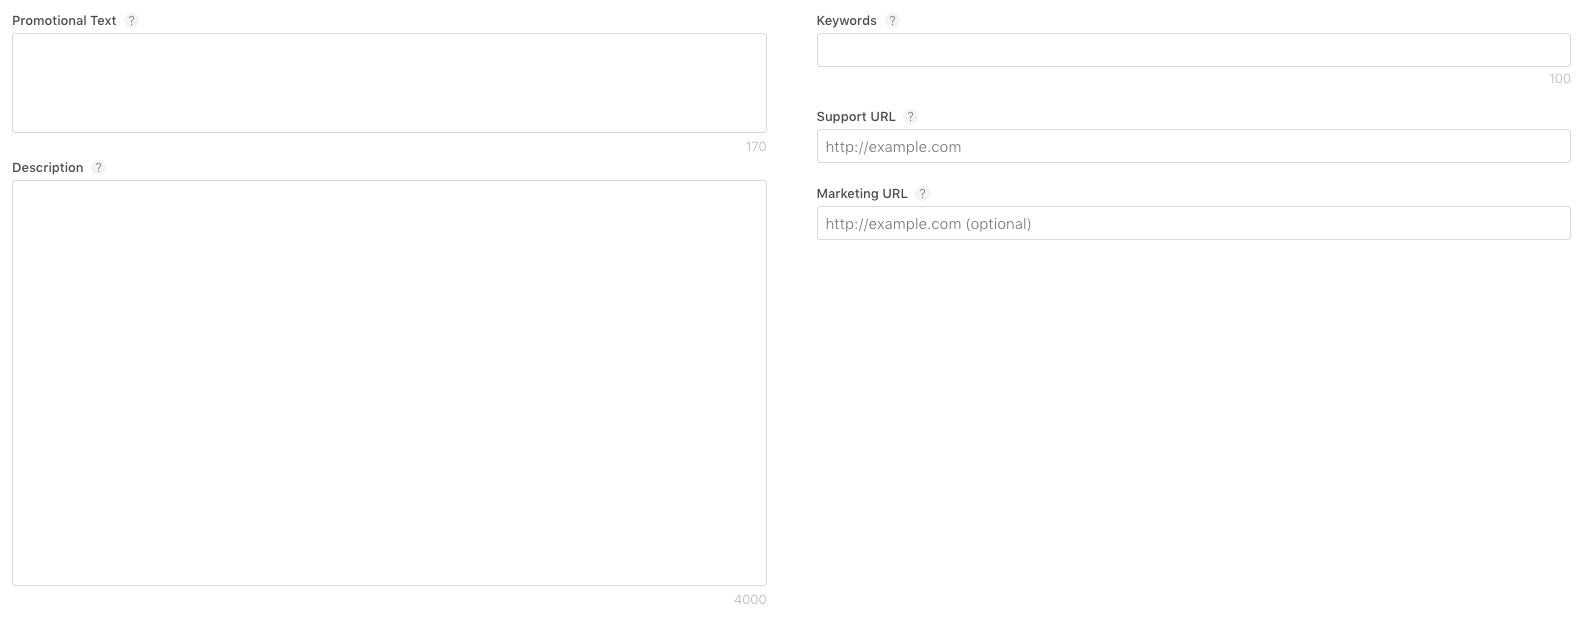
– Promotional Text (optional): Promotional text lets you inform your App Store visitors of any current app features without requiring an updated submission. This text will appear above your description on the App Store for customers with devices running iOS 11 or later.
– Description: must be 300 characters minimum, explaining to the user what he will find in your app
– Keywords: 5 at least, 10 maximum
– Support URL: it appears on your app sheet, to provide some support to users if needed
– Marketing URL (optional): a link where users can find more information about the app.
13. PAY ATTENTION HERE: Click + next to Build in order to upload your updated build. In order to upload the build here , you need to go back to step 8 of “Compiling the app steps” above. So not step 8 of these steps, but the step 8 of “Compiling the app steps”. You need to proceed there. So go there now to see how to get your App Build.
Note: you must first create your app on App Store Connect before sending the build with Xcode
Creating the .pem certificate
– Go in the Keychain Access on your Mac
– From the left menu, select “Certificates”
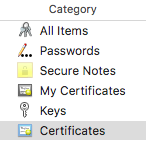
– In the search bar at the upper right, enter the bundle ID of your app
– Click on the arrow on the left of your “Apple Push Services” certificate, a private key must be attached under it

– Select the private key and the certificate
– Right-click on them
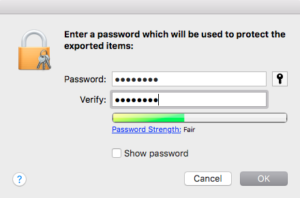
– Select “Export 2 items…”

– Choose your desktop as the destination (it can be another location but you will have to adjust the code we will give you after)
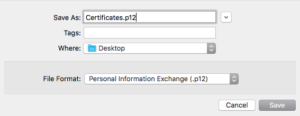
– Choose a password of your own
– Open the Terminal console of your Mac (From Applications > Utilities > Terminal)
– In the Terminal, be sure to be located on your desktop (you must have “Desktop” displayed and then your username)
![]()
– Enter this command:
“openssl pkcs12 -in Certificates.p12 -out certificat.pem -nodes -clcerts”
(If the terminal answers that there is no file named “Certificates.p12”, go on your desktop and check what is the name of this certificate .p12, and enter this name rather than Certificates.p12 in the command line)
![]()
– Enter the password you have used just before to export your certificate on your desktop

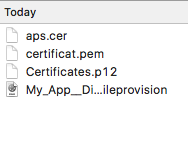
– On your desktop you have now two certificates: a Certificates.p12 and a certificat.pem.

– Move these files to the folder of your app on your Mac (with the provisionning profile and the aps.cer)
– Contact Gappsy support by going to the live chat in the bottom right corner on the www.gappsy.com website. Tell them your app name and send them your pem. certifificate. The Gappsy team will add your pem. file to the backend of the Gappsy system to activate your push notifications!
More info about Push notifications with Gappsy
To send push notifications you have to choose:
- you can send to ios and android in this case there must be the .pem certificate, and status on published for both.
- you can send on Android only, there must be no .pem certificate and the status for ios must be on “waiting”.
In cases 1 & 2 you have to create a .pem certificate.
Before keep looking at the .pem certificate creation, let’s make a brief clarification about case 2. In case 2 there must be absolutely no certificate for ios, if you have already uploaded one please remove it from both your files and your database. To remove the .pem certificate you have already uploaded, go first in your database, in the table “push_certificate”, look for the line in this table with the “app ID” of the app for which you want to remove the .pem certificate. You will get the name of the .pem certificate, it will be someting like “cert_55c311wqce5e2.pem”. Copy this file name. Delete this line in the database (be sure to not remove the table! just the line which contains this .pem certificate related to the app). Then go in your files with your file manager or with Filezilla, go in var/apps/iphone and check for the .pem certificate you have just copied. Delete the file. You are done.
Let’s keep looking at the .pem certificate creation.
- All certificates are linked each other, therefore the Apple Push Services certificate must be signed with the CSR used to create the iOS Distribution certificate used to create the provisionning profile. That means, if you change one of these items, your app will not be able to send push. For example, if you have already created a .pem certificate and you want to create it again, if you sign it with another CSR than the one used to create the iOS Distribution certificate used to create the provisionning profile of this app, you will have to edit the provisionning profile as well and to link it to the right iOS Distribution (the one created with the CSR you are using), and then you will have to submit an update of your app to the App Store and wait Apple has accepted your app.
- Your .pem certificate must be well created and must contain 4 sections:
– friendlyName: Apple Push Services
– friendlyName: iPhone Distribution
– And then two sections about keys with “Key Attributes: <No Attributes>”
If your .pem doesn’t contain these sections that means you have missed something and it will not work.